I am interested in programmatically printing labels generated in a Linux environment. For getting started, I bought a Dymo LabelWriter 450. The initial setup on my Windows laptop was easy and printing the first label using the Dymo Label software was no big deal.
The next step of installing the printer in a Linux environment was not that easy. To summarize it, you need to use the Common UNIX Printing System (CUPS) and install the Dymo LabelWriter as a printer with the matching driver. This blog post describes the necessary steps in more detail. Maybe this helps someone, who faces the same problems.
I am referring to Ubuntu 17.10 64 Bit, but the steps described here should work for other Debian based distributions too. It is assumed, that the printer has power and is connected to the Linux machine via USB cable.
Connection check
First of all, you should check, if the printer was recognized properly. Please execute the command shown below and check, if the result looks similar. If your printer is not listed, you need to check the USB connection.
vagrant@ubuntu-artful:~$ sudo lsusb
Bus 001 Device 002: ID 0922:0020 Dymo-CoStar Corp. LabelWriter 450
Bus 001 Device 001: ID 1d6b:0001 Linux Foundation 1.1 root hub
Install the driver and CUPS
The next step is installing the Linux driver. Luckily, there is a precompiled package available. Please install it using the command below.
sudo apt-get update
sudo apt-get install cups cups-client printer-driver-dymo
Download and install the printer definition
The printer setup requires an appropriate PostScript Printer Definition (PPD) file. Unfortunately, this seems not to be part of the installation package. For this reason, we need to download the CUPS driver provided by Dymo. This is currently version 1.4.0, which can be downloaded here. Afterwards the archive needs to be extracted. The model file is part of it and should be copied to the default model folder of CUPS.
wget http://download.dymo.com/dymo/Software/Download%20Drivers/Linux/Download/dymo-cups-drivers-1.4.0.tar.gz
tar -xzf dymo-cups-drivers-1.4.0.tar.gz
sudo mkdir -p /usr/share/cups/model
sudo cp /home/vagrant/dymo-cups-drivers-1.4.0.5/ppd/lw450.ppd /usr/share/cups/model/
Add the printer
As final installation step we need to find out the address of the printer for being able to register it. The lpinfo (see manpage) command shows all available printers. There should be an entry referring to the Dymo printer.
vagrant@ubuntu-artful:~$ sudo lpinfo -v
file cups-brf:/
network socket
network beh
network http
network lpd
network ipps
network https
network ipp
serial serial:/dev/ttyS0?baud=115200
direct usb://DYMO/LabelWriter%20450?serial=01010112345600
Once we know the printer address (here it is usb://DYMO/LabelWriter%20450?serial=01010112345600), we can install it using lpadmin (see manpage) like shown below. The -p parameter specifies the display name of the printer, -v is used for the printer address and the -P parameter points to location of the printer definition file.
lpadmin -p dymo -v usb://DYMO/LabelWriter%20450?serial=01010112345600 -P /usr/share/cups/model/lw450.ppd
Afterwards, the lpstat (see manpage) command is used for listing all installed printers. The list should now contain the printer we previously installed.
vagrant@ubuntu-artful:~$ lpstat -v
device for dymo: usb://DYMO/LabelWriter%20450?serial=01010112345600
Last but not least, we need to start the printer via cupsenable (see manpage) followed by the printer name we chose previously. Additionally, the printer is configured to accept jobs sent to it for printing. This is done by submitting the cupsaccept (see manpage) command followed by the printer’s name.
sudo cupsenable dymo
sudo cupsaccept dymo
Test the printer
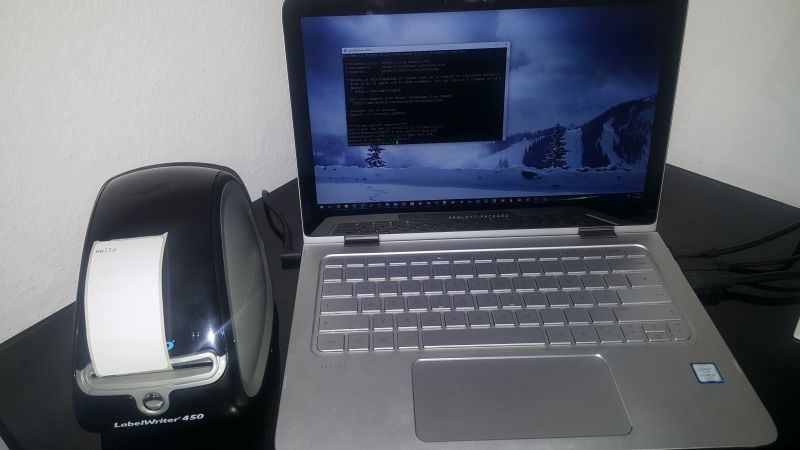
It makes sense to test the printer by printing some sample text. For this reason, we create a simple text file with some dummy text. This file is then sent to the printer for processing it by submitting the lp command (see manpage). The -d parameter specifies the name of device to choose for printing and should match the one you chose while installing the printer. If you like to use the default printer, you can omit this parameter.
echo Hello > test.txt
lp -d dymo test.txt
If everything works fine, your printer should now print a label containing the dummy text. This should look similar to the screenshot below.
Set as default printer
If you like to configure your printer as the default one, you can use the lpoptions (see manpage) command as shown below. The -d parameter specifies the name of the new default printer. This is the name you chose while installing the printer.
sudo lpoptions -d dymo
Conclusion
Installing a Dymo LabelWriter on Windows (and probably Mac) using the Dymo Label software is easy. For reaching the same goal on headless Linux requires some more steps. You need to install an appropriate driver, provide the printer definition file and register the device as a printer. This is normal CUPS related configuration. If you are experienced in this area, the setup of the Dymo LabelWriter is no challenge. If not, you can use the instructions given by this blog post.
24 Comments
Alex S on May 20, 2020
Thank you! This guide wols in 2020 it was very straightforward to set it up.
johnny on June 09, 2020
great, easy. same ppd file used currently in 2020 as the one you used. ubuntu 16 stable. looking into sdk next for more options since seem like you really need to configure it for custom labels
André on August 14, 2020
Worked perfectly on first try, thanks!
André on August 14, 2020
Worked perfectly on a Raspberry Pi 4 running Raspbian (buster) The only things I needed to change was: sudo cp /home/vagrant/dymo-cups-drivers-1.4.0.5/ppd/lw450.ppd /usr/share/cups/model/ changend into: sudo cp ./dymo-cups-drivers-1.4.0.5/ppd/lw450.ppd /usr/share/cups/model/ and I put a sudo in front of: lpadmin -p dymo -v usb://DYMO/LabelWriter%20450?serial=01010112345600 -P /usr/share/cups/model/lw450.ppd Maybe you can change this post accordingly? I think these changes are also needed for other systems.
James on October 09, 2020
Directions worked perfectly on 10/09/2020 with Linux Mint 19.3 Cinnamon. Thank you so much!
Sinitax on November 13, 2020
For arch users there is an AUR package for this called 'dymo-cups-drivers' with extra patches, as the latest libcups is incompatible with the driver source.
John Wolf on November 14, 2020
Thanks for the great instructions. This worked great on Lubuntu 18 with LabelWriter 450 Turbo. Still struggling with rotating output 90 degrees to match labels. Settings of Landscape / Reverse Landscape do nothing. Any ideas? Thanks again!
Martine on November 15, 2020
Thanks, all went smoothly. exept: nothing comes uot of the dymo 450
Olivier on November 21, 2020
Thank you so much, it works, with glabels. Strangely the printer spooler shows 2 printers: dymo & LabelWriter-450 dymo works, ... not LabelWriter-450
Roberto on December 07, 2020
Hi !! I see in my command line this message . Can you help me ? lpadmin -p dymo -v usb://DYMO/LabelWriter%20450?serial=01010112345600 -P /usr/share/cups/model/lw450.ppd lpadmin: Printer drivers are deprecated and will stop working in a future version of CUPS. lpadmin: No se ha podido abrir el archivo PPD: "/usr/share/cups/model/lw450.ppd": No se ha podido abrir el archivo PPD en la línea 0. Translate : It has can not open the file PPD: " /usr/share/cups/model/lw450.ppd" Thank you
XSheezle on December 12, 2020
I love you! Followed your directions, installed Glabel after that and HocusPokus; It Works! Dymo labelwriter 450, Linux Mint 18.3 Cinnamon 64b
SirSurfer on December 15, 2020
Hi mate, Great work. I got the CUPS drivers successfully installed on Ubuntu 20.4 and the printer (fully-functional) shows up in my list of printers. Can't seem to find any application software to format the labels for printing though -- Dymo says their software is Win/Mac only. Any ideas? Cheers and thanks!
Warwick on December 26, 2020
This worked like a charm, although I do now have a different issue. I setup a LabelWriter 4XL, found the correct driver and copied it in the same way you describe above for the 450. If I look in CUPS, I have it set to use the default 4x6" labels. When I add the printer to Windows 10 it all works fine.... except that the page size only shows A4 & Letter. It seems to be because those are the only available sizes for the Microsoft IPP Class Driver. It does print, but it's cut off at the top, and any print preview shows it as a full page. If I change the driver to be the LabelWrite 4XL driver, then I can now select my label size... but of course now nothing prints to the printer. Any ideas?
ian on December 28, 2020
Thanks a lot, this guide really helped to setup a Dymo 4XL on PI W
Olivier (the second) on December 29, 2020
Hey Andreas, Thanks for your article and thanks to the comment@tors for the 2020 extra info. So in LinuxMint 20 I installed the drivers with the terminal and: sudo apt install printer-driver-dymo When I send an order out of glabels to the printer, it moves out the label but without any print. So the mecanical function is all ok, but I can't figure out why there is no print. Does anyone have a clue about what to do in such situation. Help is highly appreciated. Happy new Year to you All. Greetz
FRACARM on January 25, 2021
Thank you very much!! It works fine with Glabel.
John on May 18, 2021
I used dietpi to simplify the setup for Cups on a raspberry pi W but it works for many other single board computers. All I had to do after installing through Diepi is `sudo apt-get install printer-driver-dymo` https://dietpi.com Everything works as expected testing locally via `lp -d dymo test.txt` Windows 10 seems to recognize and install the printer. However getting `DYMO Connect` to successfully print is another matter. It seems like a job is never received by Cups.
Hassan on June 13, 2021
Thank you for posting this. Worked on the first shot. I wasn't sure how to switch portrait to landscape via send a print command via terminal, but was able to configure the labels in LibreWriter to work.
Darrell Styner on August 20, 2021
There are recent comments here so I'll point out that, at least under Ubuntu 14.04 through 20.04, the separate step to fetch and extract the PPD files is not necessary. They're installed in compressed form by the apt install of printer-driver-dymo. Do a "lpinfo -m | grep dymo" and you'll get a list of Dymo drivers available. They'll have names like "dymo:0/cups/model/lw450tt.ppd". Specify all of that with the -m option when adding the printer and the PPD will be extracted and installed without needing to fetch files directly from Dymo. I wasn't able to find them on Dymo's site, so was happy to find them in the printer-driver-dymo package from Ubuntu. The rest of the install worked well for me and I was able to print nicely formatted, rotated, and sized labels from a test.txt file with: "lp -d lw450 -o media=w79h252 -o orientation-requested=4 -o cpi=13 -o page-left=12 -o page-top=12 test.txt". "lw450" is obviously the name of my printer. This worked for me under Ubuntu 14.04.5 and 20.04. I assume it works for all versions in between.
Tony on December 08, 2021
Hi Samuel, Nice guide. Did you archive the CUPS drivers? the links on the Dymo website are now dead and with a quick scan i can't find them still available. regards Tony
Ruxton on January 10, 2022
Best archive of the drivers i've found - https://github.com/GravisZro/dymo-cups-driver-archive
Alon on January 18, 2022
I have the same issue as 'Warwick' (he posted December 2020). I can get it all setup any have my Dymo 4XL be network connected. The default setting on the pi (3B+ running Ubuntu) is the 4x6 shipping albels. When I connect to the networked printer on Windows, the only available paper option is business card 2x 3 5, using the IPP class driver. Nothing else. I can print, but it uses that paper format. Change the print driver from IPP to the 4XL makes the paper options become available, but of course that won't work for printing. Anyone have an idea on how to resolve?
Jared on February 21, 2022
Excellent how-to. Mostly still working in 2022. Had to Google the download for the CUPS driver but that was no big deal. Thanks for taking the time and for leaving it up!
@mr_anon on April 18, 2022
@Alon 1. Change the "Make" to Raw in CUPS so the driver is not used. 2. In windows goto Control Panel\All Control Panel Items\Devices and Printers. 3. Click "Add Printer" 4. Choose "Select a shared printer by name". 4. Insert the CUPS URL for your printer for example... http://192.168.1.100:631/printers/dymolabel
Leave A Comment
I'd love to hear your opinion and experiences. Share your thoughts with a comment below! Please note that comments will appear after moderation.